
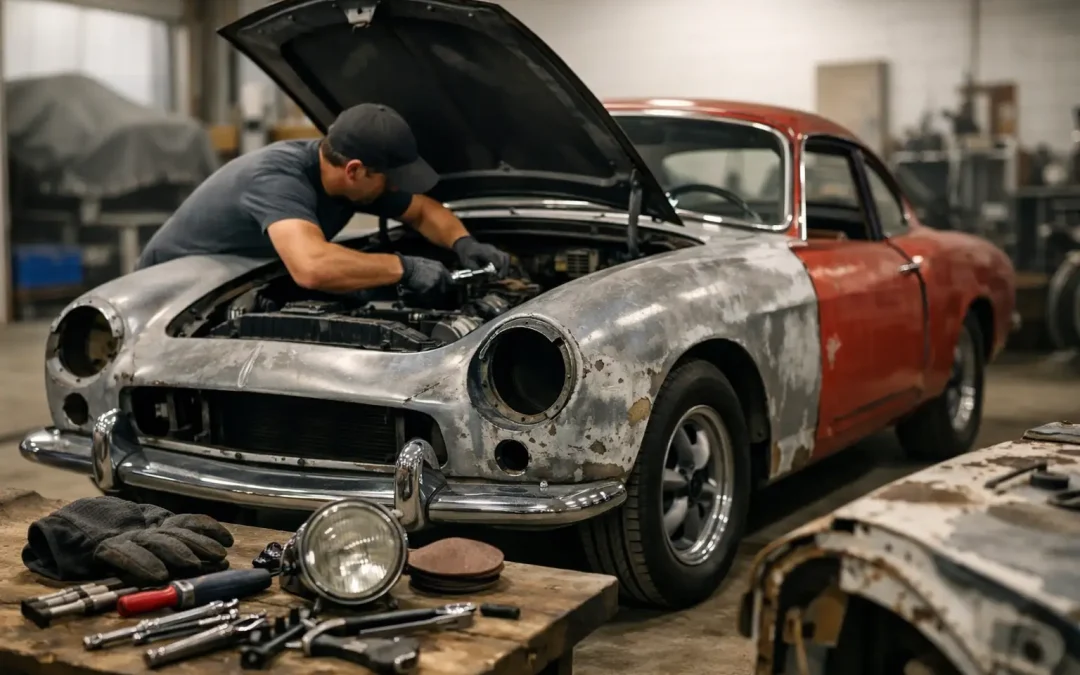
A proper restoration starts long before the first bolt comes loose. If you want to understand how to restore a classic car step by step, the first job is not sanding paint or ordering chrome. It is making honest decisions about the car in front of you, the standard you want to reach, and whether the project deserves preservation, refurbishment, or a full rebuild.
For owners of premium British cars, that distinction matters. A usable Bentley, Aston Martin, or Jaguar often benefits more from careful, sympathetic restoration than from stripping every component in pursuit of perfection. Done well, the car keeps its character, remains mechanically dependable, and protects its long-term value.
How to restore a classic car step by step starts with the right plan
Every successful restoration begins with assessment. Before any dismantling, inspect the body, chassis, drivetrain, electrical system, interior, trim, and paperwork. Take detailed photographs of every panel gap, fastener position, wiring route, and interior fitting. Label parts as they come off. A classic car can be taken apart in a weekend and spend years in boxes if there is no method behind the work.
At this stage, originality should be considered alongside condition. Matching numbers, factory trim combinations, and model-specific details can affect both market appeal and historical integrity. On some cars, replacing a tired but original component with an incorrect reproduction may reduce the car’s value more than leaving it in place until the correct part is sourced.
You also need to decide the restoration level. There is a difference between a roadworthy recommission, a cosmetic refresh, and a concours-grade restoration. Most owners are best served by a high-quality road restoration. It delivers a car you can enjoy, maintain realistically, and present with pride without creating a machine too precious to use.
Set a realistic budget before you strip the car
Budgeting is where many restorations lose control. The purchase price of the vehicle is often the smallest part of the total outlay. Metal fabrication, paint preparation, trim retrimming, brightwork, engine machining, and specialist parts can exceed expectations very quickly.
A sensible budget should include labor, parts, specialist subcontract work, transport, storage, and a contingency fund. That contingency matters because hidden corrosion, poor prior repairs, and obsolete components are common once the car is dismantled. Anyone restoring an older British car should expect surprises rather than hope to avoid them.
This is also the point to decide what work can be carried out in-house and what should be handed to specialists. Owners with good workshop discipline may handle careful disassembly, light mechanical work, or interior removal. Structural welding, paint preparation, engine machining, wood veneer restoration, and complex electrical diagnosis usually belong with experienced professionals. There is no value in saving money on the wrong stage only to pay twice to correct it later.
Disassembly should be slow, organized, and documented
Once the plan and budget are in place, disassembly can begin. Remove trim, glass, interior components, mechanical parts, and body fittings in a deliberate sequence. Bag and tag hardware. Keep assemblies together where possible. Note what is salvageable, what needs reconditioning, and what must be replaced.
This is where documentation proves its worth. Factory manuals, parts books, and photographs will save countless hours during reassembly. On prestige cars especially, small details such as the grain of a veneer panel, the style of stitching, or the finish of an under-bonnet bracket can separate a credible restoration from an expensive approximation.
Avoid cleaning or blasting everything immediately. Some original finishes provide valuable reference points. A bracket, clip, or trim piece may look tired, but it may also show the correct plating or paint sheen that should be replicated later.
Body and chassis work usually decide the quality of the restoration
If the structure is not right, nothing that follows will be right. Bodywork is not just cosmetic. It sets the foundation for panel alignment, weather sealing, paint finish, and overall integrity.
Start with rust assessment and previous repair evaluation. Corrosion in floors, sills, wheel arches, door bottoms, trunk areas, and chassis sections must be cut out and repaired properly. Covering corrosion with filler is not restoration. On high-value cars, poor metal work will eventually show in cracked paint, poor panel fit, and reduced buyer confidence.
Panel alignment should be established before final paint preparation. Doors, hood, trunk lid, and brightwork should be test-fitted to confirm gaps and shut lines. This stage takes time, and it should. Premium cars deserve precise body fit, not hurried compromise.
Paint color choice also requires discipline. Returning the car to its original factory color is often the safest route for value retention, although there are exceptions. If a non-original color is being considered, it should suit the model, period, and intended use. A dramatic change may appeal to one owner and narrow the market later.
Rebuild the mechanical systems for use, not just appearance
A classic car that looks exceptional but overheats in traffic or struggles to start is only half restored. Mechanical work should focus on reliability, drivability, and safety.
The engine should be inspected before any assumptions are made. Compression testing, oil pressure checks, and strip-down inspection will reveal whether a light refresh is enough or whether full machining is required. Replacing seals, gaskets, hoses, belts, ignition components, and cooling parts is often sensible while access is easy. On some cars, preserving a fundamentally sound original engine is preferable to an unnecessary full rebuild.
Transmission, differential, suspension, steering, and brakes all deserve the same scrutiny. Bushings, ball joints, wheel bearings, brake lines, calipers, and dampers may all need renewal depending on age and storage history. Rubber components in particular degrade with time, even on low-mileage cars.
Electrical systems are another common weak point. Brittle wiring, poor earths, aftermarket alarm remnants, and corroded connectors can cause faults that are difficult to trace once the car is back together. A careful harness inspection, proper repairs, and discreet upgrades where appropriate can transform dependability without spoiling originality.
Interior and trim restoration should respect the car’s period character
The cabin is where owners experience the result of the restoration every time they drive. It should feel right, not merely look expensive.
Seats, leather, carpets, wood, instruments, and switchgear all need to be judged on condition and originality. Sometimes the best result comes from preserving patina rather than replacing everything. Creased but well-kept leather may carry more authenticity than brand-new hides finished in the wrong grain or shade. The same applies to steering wheels, veneers, and period fittings.
Where replacement is necessary, materials should be chosen carefully. Correct leather type, carpet binding, stitching style, and trim finishes matter, especially on British luxury cars. Instrument restoration should retain original faces and markings where possible. Poorly restored gauges or generic switch replacements can make an otherwise fine car feel disappointing.
Weather seals, window channels, and convertible top materials also deserve attention. These are easy to overlook during budgeting, yet they affect comfort, water tightness, wind noise, and the overall sense of quality.
Reassembly, testing, and final tuning complete the job
Reassembly is where discipline shows. Fresh paint and restored parts can tempt people to rush, but this stage should be methodical. Install wiring, insulation, trim, glass, brightwork, and mechanical components in the correct order. Protect paint edges and finished surfaces throughout. Small mistakes made here are often the ones owners notice for years afterward.
Fluids should be added carefully, systems primed where necessary, and initial startup handled with checks for leaks, charging, temperature, and oil pressure. The car should then be road-tested in stages. Short runs expose rattles, alignment issues, brake feel, heat management, and drivability faults that static workshop checks can miss.
Final tuning should cover carburetion or injection setup, ignition timing, idle quality, cooling efficiency, braking balance, and suspension settling. A restored car often needs several rounds of adjustment before it feels properly sorted. That is normal.
When to involve a specialist
Not every owner wants a full DIY project, and not every car should be one. If the vehicle is rare, structurally compromised, incomplete, or part of a valuable collection, specialist oversight is usually the wiser route. The right restoration partner brings technical judgment, model-specific sourcing knowledge, and an understanding of what should be preserved, renewed, or left alone.
For owners in North London and Hertfordshire, working with a marque-aware specialist can also simplify transport, inspection, and long-term aftercare. Businesses such as Tedella Ltd combine restoration experience with buying, selling, and part exchange knowledge, which can be particularly useful if you are balancing sentimental goals with market value.
The best restored classics do not feel overdone. They feel correct. Every decision, from metal work to leather finish, should serve the car’s identity and your intended use. If you approach the process with patience, technical honesty, and respect for the marque, the result is more than a repaired vehicle. It is a classic you can trust, enjoy, and hand on with confidence.
Recent Comments